Living Room Vibes: From Boring to Beautiful in Simple Steps
Hey there, friend! Ever walked into your living room and thought, “Meh, this place feels like a waiting room at the dentist’s office”? Yeah, I’ve been there. My old apartment had this living room that was just… blah. Beige walls, mismatched furniture from college days, and zero personality. But guess what? You don’t need a huge budget or a design degree to turn it around. We’re talking simple steps that anyone can tackle over a weekend or two. I’ll walk you through it with my own opinions tossed in, ’cause why not? Let’s make your space feel like a cozy hug instead of a forgotten corner. Buckle up—this is gonna be fun!
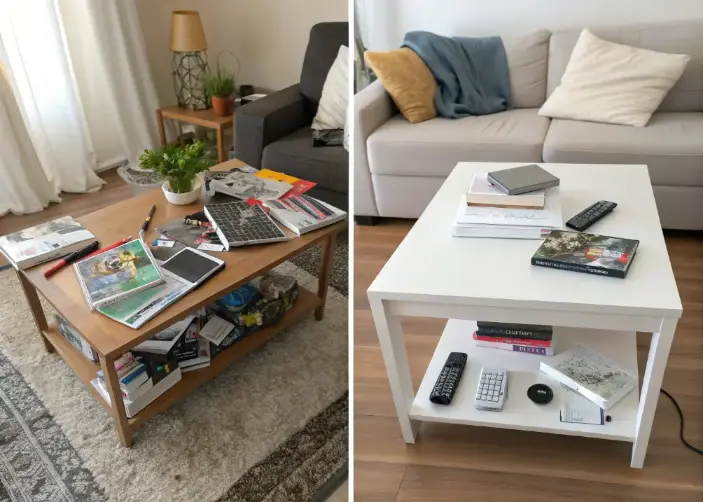
Step 1: Assess What You’ve Got and Declutter Like a Boss
First things first, let’s take a good hard look at your living room. Grab a coffee (or wine, no judgment), plop down on the couch, and really scan the room. What’s working? What’s not? Is that pile of magazines from 2015 still chilling on the coffee table? Or that random lamp your aunt gave you that you secretly hate?
I remember when I did this in my place—turns out, half my stuff was just clutter making the room feel cramped and chaotic. Decluttering isn’t about tossing everything; it’s about keeping what sparks joy, as Marie Kondo would say. Start by sorting into keep, donate, and trash piles. Be ruthless but kind to yourself. If something doesn’t fit your vibe anymore, let it go. It frees up space and your mind.
Pro tip: Use storage solutions like baskets or ottomans with hidden compartments. I snagged a cheap woven basket from a thrift store, and now it hides all my remotes and chargers. Boom— instant tidy vibes. And don’t forget the walls! If they’re cluttered with too many frames or shelves, pare it down. A clean slate makes the next steps way easier.
This step alone can make your room feel 50% better without spending a dime. Trust me, once the junk’s gone, you’ll breathe easier and get excited for the fun parts.
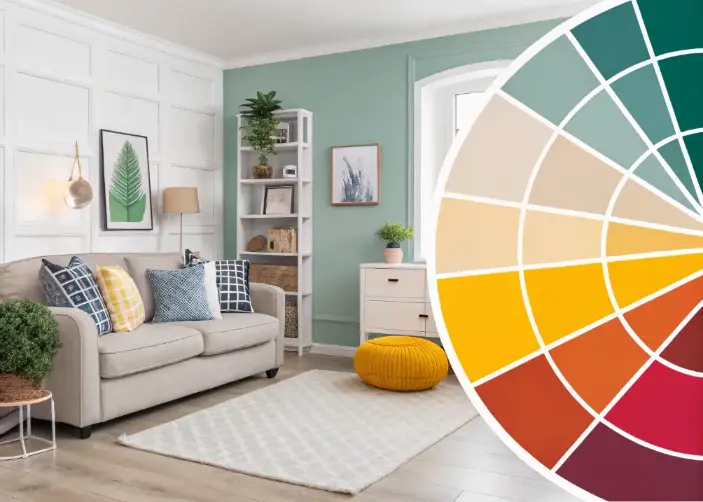
Step 2: Pick a Color Scheme That Speaks to Your Soul
Colors, oh man, they’re game-changers. A boring living room often screams “neutral overload” with all that white, gray, or beige. Nothing wrong with neutrals—they’re safe—but let’s add some life!
Think about what mood you want. Cozy and warm? Go for earthy tones like terracotta or deep greens. Energetic? Pops of yellow or blue. I’m a sucker for moody blues myself; painted one wall in my living room a soft navy, and it made the whole space feel sophisticated without being stuffy.
Start small if you’re scared. Paint an accent wall or just the inside of a bookshelf. If painting’s too much commitment (hey, renters unite!), use throw pillows, rugs, or curtains. Mix patterns but keep ’em in the same color family to avoid clown-house vibes. Relatable example: My friend tried all-red everything once—looked like a tomato exploded. Lesson learned: Balance is key.
Tools you’ll need? Paint samples from the hardware store—test ’em on the wall first, ’cause lighting changes everything. And don’t ignore the ceiling! A light tint up there can make the room feel taller. Opinions vary, but I say go bold if it makes you happy. Your home, your rules.
By the end of this, your walls won’t be whispering “boring”—they’ll be shouting “welcome home!”
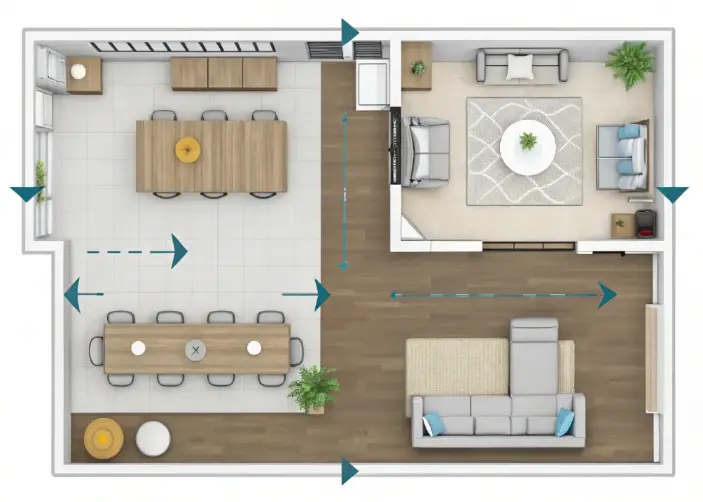
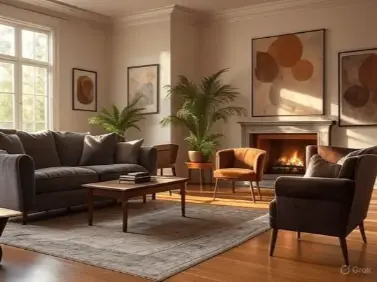
Step 3: Rearrange Furniture for Better Flow and Feels
Okay, now that we’ve decluttered and colored up, let’s talk furniture shuffle. Ever notice how some rooms feel awkward to navigate? Like, you gotta sidestep the coffee table just to sit down? Yeah, that’s bad flow.
Map out your room on paper or use an app—there’s free ones out there. The goal? Create conversation areas. Push the couch against a wall if space is tight, or float it in the middle for a more open feel. I did the floating thing in my small living room, and suddenly it felt twice as big. Add a rug to anchor the seating group; it defines the space without walls.
Mix it up with multi-functional pieces. That old armchair? Tuck it in a corner with a side table for a reading nook. And scale matters—big room, big furniture; tiny room, sleek stuff. My opinion? Avoid matching sets; they’re so cookie-cutter. Thrift a vintage chair and reupholster it for personality.
Test different layouts. Walk around, sit, chat—does it feel natural? If not, tweak. This step’s free and can totally revamp the vibe. Plus, it’s like a puzzle; satisfying when it clicks.
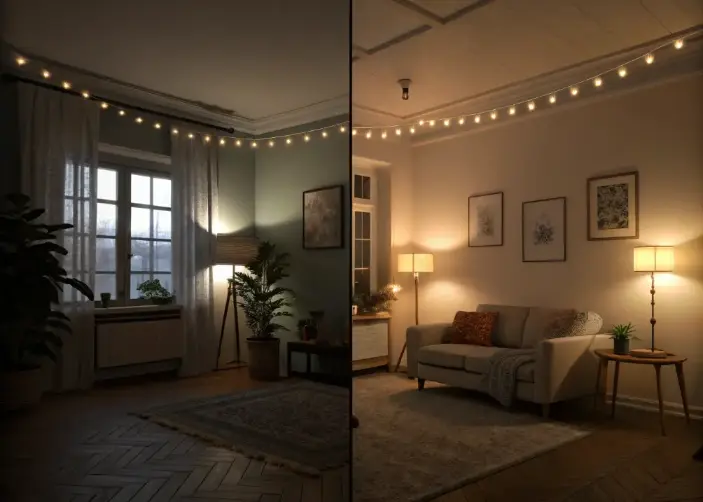
Step 4: Light It Up—Layers of Lighting Magic
Lighting’s the unsung hero of any room. A single overhead light? That’s why your space feels flat and uninviting, like a hospital waiting area. Let’s layer it!
Start with ambient lighting: Soften that harsh ceiling fixture with a dimmer switch. Then add task lights—like floor lamps for reading or table lamps on side tables. I love string lights draped over a shelf; they’re cheap and add whimsy.
Accent lighting highlights cool stuff: Spotlights on artwork or LED strips behind the TV. Natural light? Maximize it with sheer curtains. My living room faces north, so it’s dim—added mirrors to bounce light around, and whoa, difference maker.
Go for warm bulbs (2700K-ish) for cozy evenings. Smart bulbs are fun too; change colors with your phone. Relatable story: Once hosted a game night with just overhead lights—everyone looked washed out and grumpy. Switched to lamps, instant party vibe.
Budget tip: Thrift lamps and spray-paint bases. Easy peasy. Good lighting makes everything look better, even if the room’s not perfect yet.
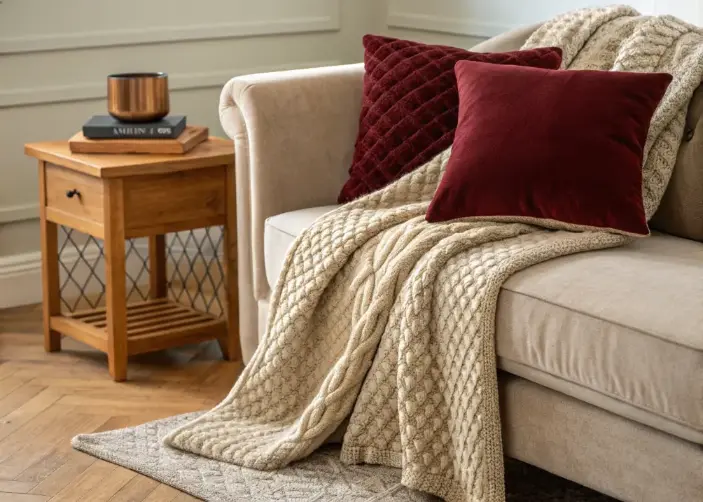
Step 5: Add Textures and Layers for That Cozy Depth
Textures are like the secret sauce—without ’em, even a colorful room feels one-dimensional. Think smooth leather couch? Add fluffy throws. Hardwood floors? Layer a soft rug.
Mix materials: Wood, metal, fabric, wicker. I tossed a chunky knit blanket over my sofa, and it screamed “curl up here with Netflix.” Pillows in velvet, linen, or faux fur add pop. Don’t overdo; 3-5 textures max per area.
Wall textures too—hang a macramé piece or woven tapestry. Floors: Area rugs over carpet for definition. My take: Natural fibers like jute feel grounding, but sisal’s scratchy—avoid if you have pets or kids.
Layering builds interest. Start with big items (rug, curtains), then medium (pillows, throws), finish with small (vases, books). It’s like dressing an outfit—accessories make it.
This step turns “boring” into “beautiful” by engaging senses. Touchy-feely goodness!
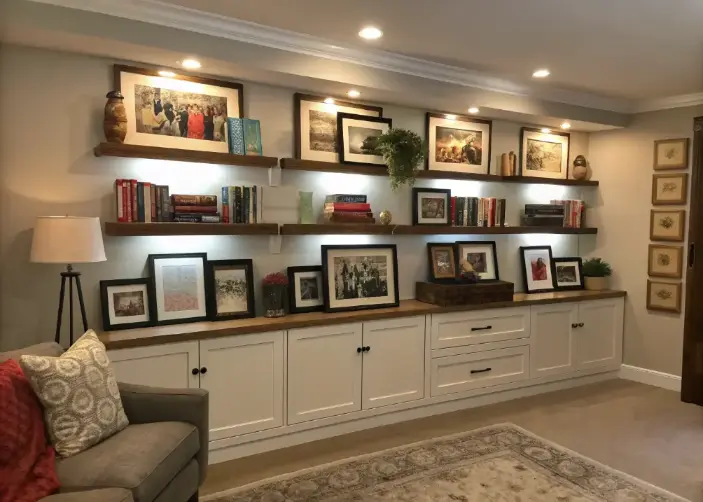
Step 6: Personal Touches—Make It Yours, Not a Showroom
Here’s where the magic happens: Infusing your personality. A beautiful room without soul is just pretty pictures in a catalog. Add stuff that tells your story.
Gallery wall of family photos, travel souvenirs, or art prints. I framed concert tickets and postcards—cheap frames from dollar store. Bookshelves: Stack books horizontally/vertically, mix with plants or knick-knacks.
Scent matters too—candles or diffusers in your fave smells. Music setup? Vintage record player for vibes. Relatable: My buddy’s room was sterile till he added his guitar on a stand—suddenly, it felt lived-in.
DIY alert: Paint a canvas abstract or upcycle jars into vases. Opinions? Skip trends; go timeless with what you love. Hate minimalism? Pile on the eclectic. It’s your sanctuary.
These touches make guests go “This is so you!” And that’s the win.
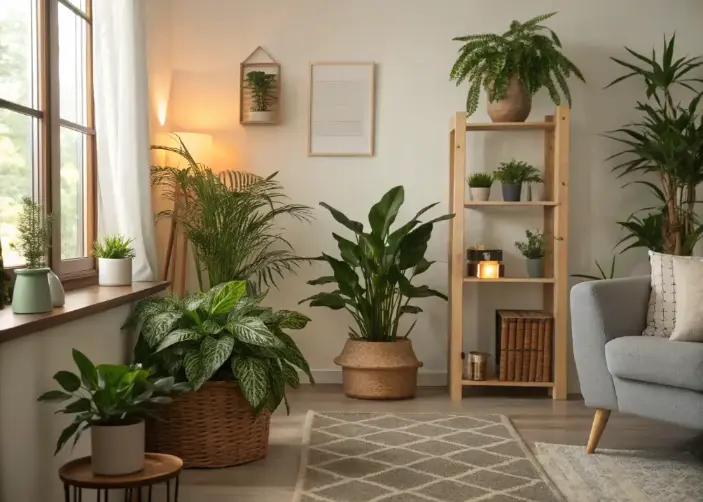
Step 7: Bring in the Greenery—Plants for Life and Fresh Air
Plants, plants, plants! They’re affordable, purify air, and add organic beauty. A boring room perks up with just a few greens.
Start easy: Snake plant or pothos for low-light spots. I’m plant-obsessed; my fiddle leaf fig’s my pride, but it needs sun—learn your room’s light. Group ’em: Cluster on shelves or hang from ceiling.
Faux if real’s too much maintenance (no shame). Terrariums or succulents for desks. My opinion: Big statement plants like monstera fill empty corners perfectly.
Watering tip: Set reminders; overwatering kills more than neglect. Pots: Mix ceramics, baskets for style.
Greenery softens edges, brings nature in. Your room’ll feel alive, not stagnant.
Wrapping It Up: Enjoy Your New Vibes
Whew, we covered a lot! From decluttering to planting, these steps take your living room from yawn-worthy to “I never wanna leave.” Remember, it’s not about perfection—it’s about creating a space that feels good to you. Mix in your quirks, experiment, and tweak as you go. My transformed room? Now it’s where I unwind, host friends, and feel truly at home.
What’s your first step? Drop a comment—I’d love to hear! And if it inspires you, share your before/after pics. Happy decorating!
“Found this post useful? Don’t forget to explore my other blogs packed with fun and adorable ideas!”
Cozy Campfire Essentials for the Perfect Night Outdoors
Keep the Spark Alive: 52 Fun Questions for Date Night
20+ Dope iPhone Wallpapers for Guys Who Want to Stand Out
35+ Blue Butterfly iPhone Wallpapers Download (Free Aesthetic Collection)